


konfigurasi Jaringan
====================
port ethernet no.3 ------- SQUID
Klien ---- Switch ---- port ethernet no.2
port ethernet no.1-------Modem
Konfigurasi di MikroTik
=======================
#copy paste command dibawah ini menggunakan menu New Terminal di Winbox#
--------------------------------------------------------------------------
kasi nama interface dan IP address
----------------------------------
/interface ethernet
set 2 name=ether3-proxy
/ip address
add address=192.168.5.1/24 interface=ether3-proxy
Instalasi pada PC Proxy
=======================
--Instalasi Web Proxy di Ubuntu Server 12.04 part 1 - Instalasi Ubuntu Server 12.04---
Hardware (silahkan disesuaikan)
========
- Proc Core 2 Duo
- HDD 40 GB
- RAM 1 GB
- CD/DVD RW
Software
========
- Download Ubuntu Server ver 12.04 (iso)
- Download & Install Putty Installer
- Download & Install WinSCP Installer
Persiapan
=========
- Install NIAT terlebih dahulu :-)
- Burn iso file ke CD /DVD
- Set BIOS PC untuk First Boot melalui CD/DVD
Instalasi Ubuntu Server ver 12.04 Lts
=====================================
Silahkan ikuti petunjuk instalasi dibawah ini. Jumlah cache dan besaran cache sila disesuaikan
---- Configure Language, Location, locales ----
- English [ Tekan Enter ]
- Install Ubuntu Server [ Tekan Enter ]
- English [ Tekan Enter ]
- Other [ Tekan Enter ]
- Asia [ Tekan Enter ]
- Indonesia [ Tekan Enter ]
- United States [ Tekan Enter ]
----Configure the keyboard----
- No [ Tekan Enter ]
- English (US) [ Tekan Enter ]
- English (US) [ Tekan Enter ]
---- Configure the network ----
- Continue [ Tekan Enter ]
- Configure Network Manually [ Tekan Enter ]
- IP Address : 192.168.5.2 [ Tekan Enter ]
- Netmask : 255.255.255.0 [ Tekan Enter ]
- Gateway : 192.168.5.1 [ Tekan Enter ]
- Name Server address : 192.168.5.1 [ Tekan Enter ]
- Hostname : BelajarJaringan [ Tekan Enter ]
- Domain name : [ Tekan Enter ]
- Full name for new user : Belajar Jaringan [ Tekan Enter ]
- username for your account : belajar [ Tekan Enter ]
- choose a password for the new user : passwordku [ Tekan Enter ]
- Re-enter password to verify : passwordku [ Tekan Enter ]
- Encrypt your home directory? : No [ Tekan Enter ]
---- Configure the clock ----
- Jakarta
---- Partition disk ----
- Manual
- SCSI1 (0,0,0) (sda) - 42.9 GB [ Tekan Enter ]
- Create New Partition table on this device ? Yes [ Tekan Enter ]
- pri/log 42.9 GB FREE SPACE [ Tekan Enter ]
- Create a New Partition
- New Partition size : 1 GB [ Tekan Enter ]
- Type for the new partition : Primary [ Tekan Enter ]
- Location for the new partition : Beginning [ Tekan Enter ]
- Pilih Mount point [ Tekan Enter ]
- Pilih /boot - static files of the boot loader [ Tekan Enter ]
- Pilih Mount options [ Tekan Enter ]
- Pilih Noatime [Tekan Tombol Spacebar] [ Tekan Enter ]
- Pilih Bootable flag [ Tekan Enter ]
- Pilih Done setting up the partition [ Tekan Enter ]
- pri/log 41.9 GB FREE SPACE [ Tekan Enter ]
- Create a New Partition
- New Partition size : 2 GB [ Tekan Enter ]
- Type for the new partition : Primary [ Tekan Enter ]
- Location for the new partition : Beginning [ Tekan Enter ]
- Pilih Use [ Tekan Enter ]
- Pilih swap area [ Tekan Enter ]
- Pilih Done setting up the partition [ Tekan Enter ]
- pri/log 39.9 GB FREE SPACE [ Tekan Enter ]
- Create a New Partition
- New Partition size : 19.9 GB [ Tekan Enter ] ------------------> Saya sisakan 20 GB untuk cache dir
- Type for the new partition : Primary [ Tekan Enter ]
- Location for the new partition : Beginning [ Tekan Enter ]
- Pilih Mount point [ Tekan Enter ]
- Pilih / - the root file system [ Tekan Enter ]
- Pilih Mount options [ Tekan Enter ]
- Pilih Noatime [Tekan Tombol Spacebar] [ Tekan Enter ]
- Pilih Done setting up the partition [ Tekan Enter ]
- pri/log 20 GB FREE SPACE [ Tekan Enter ]
- Create a New Partition
- New Partition size : 20 GB [ Tekan Enter ]
- Type for the new partition : Logical [ Tekan Enter ]
- Location for the new partition : Beginning [ Tekan Enter ]
- Pilih Use [ Tekan Enter ]
- Pilih ReiserFS journaling file system
- Pilih Mount point [ Tekan Enter ]
- Pilih Enter manually [ Tekan Enter ]
- Hapus /Home ganti menjadi /cache1 [ Tekan Enter ]
- Pilih Mount options [ Tekan Enter ]
- Pilih Noatime [Tekan Tombol Spacebar], Pilih Notail [Tekan Tombol Spacebar] [ Tekan Enter ]
- Pilih Done setting up the partition [ Tekan Enter ]
- Pilih Finish partitioning and write changes to disk [ Tekan Enter ]
- Write the changes to disks : Yes [ Tekan Enter ]
--- Configure the package manager ----
- HTTP proxy information (blank for none) : [ Tekan Enter ]
--- Configure tasksel ---
- How do you want to manage upgrade on this system? : No automatic updates [ Tekan Enter ]
--- Software selection ---
- Pilih OpenSSH Server [Tekan Tombol Spacebar] [ Tekan Enter ]
--- Install the GRUB boot loader on a hard disk---
- Install the GRUB boot loader to the master boot record? : Yes [ Tekan Enter ]
--- [!!] Finish the installation ---
- Pilih Continue [ Tekan Enter ]
- keluarkan CD Installer
Mengganti Password root
=======================
1. Login ke Proxy melalui WinSCP/ Putty dengan login yg Anda buat sewaktu install
2. ketik perintah dibawah ini
sudo su [tekan ENTER]
(masukkan password user yang anda buat sewaktu install)
3. ketik lagi
passwd root [tekan ENTER]
ENTER new UNIX password : (masukkan password baru untuk root)
Retype new UNIX password : (masukkan kembali password yang sama)
pastikan muncul tulisan : passwd : password updated successfully
Instalasi Squid 3 HEAD
======================
Petunjuk:
--------------
- Login ke Program WinSCP menggunakan user root
- Copy Paste Perintah-Perintah dibawah ini melalui Putty (Copy lalu Klik kanan pada putty tekan Enter) :
apt-get update
apt-get install devscripts build-essential openssl libssl-dev fakeroot libcppunit-dev libsasl2-dev cdbs ccze libfile-readbackwards-perl libcap2 libcap-dev libcap2-dev
apt-get install sysv-rc-conf
wget http://www.squid-cache.org/Versions/v3/3.4/squid-3.4.0.2.tar.gz
tar xzvf squid-3.4.0.2.tar.gz
cd squid-3.4.0.2
./configure --prefix=/usr \
--bindir=/usr/bin --sbindir=/usr/sbin \
--libexecdir=/usr/lib/squid --sysconfdir=/etc/squid \
--localstatedir=/var --libdir=/usr/lib --includedir=/usr/include --datadir=/usr/share/squid \
--infodir=/usr/share/info --mandir=/usr/share/man \
--disable-dependency-tracking --enable-storeio=ufs,aufs,diskd --enable-removal-policies=lru,heap --enable-icmp --enable-esi --enable-icap-client \
--disable-wccp --disable-wccpv2 \
--enable-kill-parent-hack --enable-cache-digests --enable-follow-x-forwarded-for --enable-x-accelerator-vary --enable-zph-qos \
--with-default-user=proxy --with-logdir=/var/log/squid --with-pidfile=/var/run/squid.pid --with-large-files --enable-ltdl-convenience --with-filedescriptors=65536 \
--enable-ssl --enable-ssl-crtd --disable-auth --build=i486-linux-gnu build_alias=i486-linux-gnu
make && make install
chown -R proxy:proxy /cache
chown -R proxy:proxy /var/log/squid
## Copy 2 file berikut menggunakan Program WinSCP
=================================================
- File "squid.conf" (sila download di http://pastebin.com/PKZkLfpD) yang telah diubah dan disesuaikan dengan kebutuhan ke folder: /etc/squid/
- File "squid" (sila download di http://pastebin.com/8xLYXZQC)ke folder: /etc/init.d/
ijin execute squid
==========================
chmod +x /etc/init.d/squid
Setup SSL Bump
==============
cd /etc/squid
mkdir ssl_cert
cd ssl_cert
openssl req -new -newkey rsa:1024 -days 365 -nodes -x509 -keyout myCA.pem -out myCA.pem
openssl x509 -in myCA.pem -outform DER -out myCA.der
cd
mkdir /var/squid
cd /var/squid
mkdir ssl_db
cd
chown -R nobody /var/squid/ssl_db/
/usr/lib/squid/ssl_crtd -c -s /var/squid/ssl_db/certs
chown -R proxy:proxy /var/squid/ssl_db/
swap dir
========
squid -z
Copy Paste Perintah-Perintah dibawah ini pada file /etc/rc.local
================================================================
modprobe xt_TPROXY
modprobe xt_socket
modprobe nf_tproxy_core
modprobe xt_mark
modprobe nf_nat
modprobe nf_conntrack_ipv4
modprobe nf_conntrack
modprobe nf_defrag_ipv4
modprobe ipt_REDIRECT
modprobe iptable_nat
iptables -t mangle -F
iptables -t mangle -X
iptables -t mangle -N DIVERT
iptables -t mangle -A DIVERT -j MARK --set-mark 1
iptables -t mangle -A DIVERT -j ACCEPT
iptables -t mangle -A INPUT -j ACCEPT
iptables -t mangle -A PREROUTING -p tcp -m socket -j DIVERT
iptables -t mangle -A PREROUTING ! -d 192.168.5.2/32 -p tcp --dport 80 -j TPROXY --tproxy-mark 0x1/0x1 --on-port 3129
iptables -t mangle -A PREROUTING ! -d 192.168.5.2/32 -p tcp --dport 443 -j TPROXY --tproxy-mark 0x1/0x1 --on-port 3127
/sbin/ip rule add fwmark 1 lookup 100
/sbin/ip route add local 0.0.0.0/0 dev lo table 100
echo 0 > /proc/sys/net/ipv4/conf/lo/rp_filter
echo 1 > /proc/sys/net/ipv4/ip_forward
iptables -t nat -A POSTROUTING -o eth1 -j MASQUERADE
exit 0
Mangle dan Routing TPROXY
-------------------------
/ip firewall mangle
add action=mark-routing chain=prerouting comment="TPROXY ROUTING" disabled=no dst-port=80,443 in-interface=ether2-Lan new-routing-mark=tproxy_rm passthrough=no protocol=tcp
add action=mark-connection chain=prerouting disabled=no dst-port=80,443 in-interface=ether3-Proxy new-connection-mark=tproxy_cm passthrough=yes protocol=tcp src-address=!192.168.2.1
add action=mark-routing chain=prerouting connection-mark=tproxy_cm disabled=yes in-interface=!ether3-Proxy new-routing-mark=tproxy_rm passthrough=no
/ip route
add disabled=no distance=1 dst-address=0.0.0.0/0 gateway=192.168.2.1 routing-mark=tproxy_rm scope=30 target-scope=10
---------------------------------------------------------------------------------------------
NAT
MASQ
chain=srcnat action=masquerade src-address-list=mine
out-interface=INTERNET
PROXY
chain=dstnat action=dst-nat to-addresses=192.168.2.1 to-ports=3128
protocol=tcp src-address=!192.168.2.0/24 in-interface=LAN
dst-port=80
REMOTE SSH PUTTY
chain=dstnat action=dst-nat to-addresses=192.168.2.1 to-ports=22
protocol=tcp dst-port=22
MANGLE
PROXY
chain=prerouting action=mark-connection new-connection-mark=proxy-c
passthrough=yes src-address=192.168.2.1 dst-address=192.168.1.0/24
chain=prerouting action=mark-packet new-packet-mark=proxy p passthrough=no
connection-mark=proxy-c
PROXY HIT
chain=postrouting action=mark-packet new-packet-mark=proxy-wuss
passthrough=no dscp=12
YOUTUBE
chain=prerouting action=mark-connection new-connection-mark=youtube.conn
passthrough=yes src-address-list=mine dst-address-list=youtube
chain=prerouting action=mark-packet new-packet-mark=Utube-pak passthrough=no
connection-mark=youtube.conn
BW lokal
chain=prerouting action=mark-connection new-connection-mark=iix-conn
passthrough=yes src-address-list=mine dst-address-list=nice
chain=prerouting action=mark-packet new-packet-mark=iix pak passthrough=no
connection-mark=iix-conn
BW inter
chain=prerouting action=mark-connection new-connection-mark=intl-conn
passthrough=yes src-address-list=mine dst-address-list=!nice
chain=prerouting action=mark-packet new-packet-mark=intl-pak passthrough=no
connection-mark=intl-conn
ICMP
chain=prerouting action=mark-connection new-connection-mark=icmp
passthrough=yes protocol=icmp
chain=prerouting action=mark-packet new-packet-mark=ip passthrough=yes
connection-mark=www.wirelessrouterproxy.blogspot.com ic
chain=prerouting action=change-dscp new-dscp=1 packet-mark=ip
DNS
chain=prerouting action=mark-connection new-connection-mark=dc
passthrough=yes protocol=tcp dst-port=53
chain=prerouting action=mark-connection new-connection-mark=dc
passthrough=yes protocol=udp dst-port=53
chain=prerouting action=mark-packet new-packet-mark=dp passthrough=yes
connection-mark=www.wirelessrouterproxy.blogspot.com dc
YOUTUBE LIST
youtube 103.11.28.10-103.11.28.150
youtube 103.11.30.10-103.11.30.150
youtube 173.194.51.104
mime IPlokal
First enable the root account by running the command...
:~# sudo passwd -u root
Enter your personal password to continue...
Now reset - add the root password by running the command...
:~# sudo passwd root
You will be prompted for a new password for the root user
That's it, you can switch to root with the 'su' command...
:~# su
enter the root password...
Ah, but it's not over, if you try to login via SFTP as root you will find that your ignored, hmm, what have Ubuntu got against root?
Solution is to edit sshd_config...
:~# nano /etc/ssh/sshd_config
and edit line 28 from...
PermitRootLogin without-password
to
PermitRootLogin yes
Save changes and exit...
Then restart SSH...
:~# service ssh restart
There done, now you can login via SFTP as root.
Here endeth the lesson.
Tips Praktis kali ini menghadirkan tutorial luar biasa, yaitu cara unlock modem Bolt ZTE MF90 secara gratis! Anda tidak perlu membeli credit untuk software DC Unlocker!

Jika biasanya Anda menemui penawaran jasa unlock dengan fee berkisar 30-70rb, maka dengan mengikuti tutorial ini, Anda bisa menghemat biaya tersebut. Tapi jika memang Anda tidak mampu mengikuti tutorial ini, dan butuh cepat, saya sangat menyarankan untuk menggunakan jasa unlock saja.
Berikut ini langkah-langkahnya :
Siapkan dahulu modem Bolt Anda, masih dengan kartu Bolt dan colokkan ke PC dengan kabel USB. Unlock tidak dapat dilakukan jika konek ke modem Bolt melalui wifi.
Jika sebelumnya sudah pernah diganti settingnya, reset modem anda ke settingan factory semula. (tekan tombol reset yang ada di belakang modem). Jika belum pernah ganti settingan, tidak perlu reset factory.
Jalankan semua program / langkah dibawah ini dengan Run As Administrator.
Download dc-unlocker terbaru. pastikan versinya yang terbaru minimal versi 1.00.1105
Download multi tool updater from official website (BOLT) Jangan download patch dari dc-unlocker. Double click multi tool tersebut, namun terserah mau update / ga terserah anda. Panduan untuk update ada di websitenya juga, jadi coba cari terlebih dahulu.
Jangan lupa untuk copy setup.exe yang ada di %temp%\OneKeyUpdate. Caranya tekan gambar windows di keyboard + R. Lalu masukkan %temp%\OneKeyUpdate. Copy setup.exe ke desktop lalu di instal sampai selesai.
Buat folder MF90 di desktop, lalu buka folder C:\Program Files\ZTE LTE Datacard Product USB Driver\. Lalu copy 3 file -> adb.exe AdbWinApi.dll AdbWinUsbApi.dll ke folder MF90
(dll disini adalah ekstension file, bukan dan lain lain). Buka file ini dari internet lalu copy diag1F4E_F0AA.bin dan bckfrmDM.bin ke folder MF90. Lalu download file ini noah-ADB! extract lah file ini dan masukan seluruh folder ke folder MF90
(dll disini adalah ekstension file, bukan dan lain lain). Buka file ini dari internet lalu copy diag1F4E_F0AA.bin dan bckfrmDM.bin ke folder MF90. Lalu download file ini noah-ADB! extract lah file ini dan masukan seluruh folder ke folder MF90
Salin kode dibawah ini ke notepad, save as “Instal_ADB_driver.bat”, taruh filenya di folder “MF90″
@echo off
echo start copying..
@echo on
copy / b diag1F4E_F0AA.bin COM2
copy / b bckfrmDM.bin COM2
@echo off
echo end copying..
echo ===========================
echo bat file created by noah
echo ===========================
pause
exit
* COM portnya diganti sesuai # COM diagnostic port
kalo ga ngerti diagnostic port, silahkan buka device manager di windows lalu cari tulisan port. nah disitu tertera semuanya atau buka DC-Unlocker versi yang terbaru lalu pilih ZTE modem di select manufacturer, lalu tekan tombol find (gambar kaca pembesar).
Nanti akan kelihatan disitu diagnostic portnya berapa (Diatas kaca pembesar ada tulisan diagnostic port)
Salin kode dibawah ini ke notepad, save as “unlock.bat”, taruh filenya di folder “MF90″
adb devices
adb shell mv etc/init.d/zlocknetapp etc/init.d/zlocknetapp.bak
adb shell reboot
adb shell
@echo off
echo ===========================
echo bat file created by noah
echo / # ===========================
pause
exit
Setelah di lakukan semua ini step nya
1. colok modem sampai keluar web gui nya kalo gak paham sampai dia buka sendiri browser dan mengakses IP 192.168.1.1 dan muncul login bolt (proses ini lakukan dalam keadaan kartu bolt yang terpasang)
jika tidak terjadi apa-apa lakukan reset di bagian belakang modem, atau jika autorun mati bisa buka drive bolt dari windows explorer klik autorun. jika berhasil login ok lanjut…..
2. buka DC Unlocker lalu pilih ZTE modem, dan dibagian ke 2 pilih auto, lalu klik search. perhatikan device manager disana akan terdeteksi ada port Diagnostic dan APP. catat COM PORT number nya jika COM4 yah ganti lah yang di file Instal_ADB_driver.bat jadi COM4 jika selesai.
3. setelah terdeteksi lalu execute or klik tanpa run administrator “Instal_ADB_driver.bat” yang di bikin sebelumnya dan perhatikan nanti akan ada 2 file tercopy dan berhasil.
4. cabut modem dari usb tapi jangan di matikan, cabutlah beberapa detik lalu colok in lagi, nanti akan mendeteksi driver baru, perhatikan driver yg gagal terinstal, itu adalah ZTE adb, bisa di instal dari driver yg di download sebelum mulai tadi pilih have disk dan browse ke folder noah-ADB yang di extract
5. akan muncul di device manager ZTE ADB (Android Composite ADB Interface) <--- jika ini sudah keluar maka execute lah or klik tanpa run administrator "unlock.bat".
6. modem akan restart, cabut modem lalu reset lewat tombol belakang. lalu cabut batre, masuk kan kartu simcard GSM lain dan nyalakan.
7. selesai dan sukses
7. selesai dan sukses
Sebenarnya ini masalah clasic , jika menggunakan mikrotik dan dns
pada client di set menggunakan mikrotik , maka tampilan yahoo sering
error , image tidak muncul. sehingga di web yahoo atau yahoo mail hanya
muncul teks saja. anehnya bila kita tidak menggunakan mikrotik (
langsung ke modem hal ini tidak terjadi ) ,
Analisa :
hasil dns query yang tersimpan di pc maupun di cache dns mikrotik
sudah tidak valid lagi. hal ini terbukti hasil dns query berbeda
sebelum flush dns di client dan flush dns cache di mikrotik.
yang harus di lakukan adalah flushdns di client dan flush dns cache di mikrotik, agar hasil query dns uptodate ( valid lagi )
Tapi capek kan kalau setiap menemukan masalah ini terulang ulang

tampilan yahoo error
Pada pc client:
Buka DF / SD nya
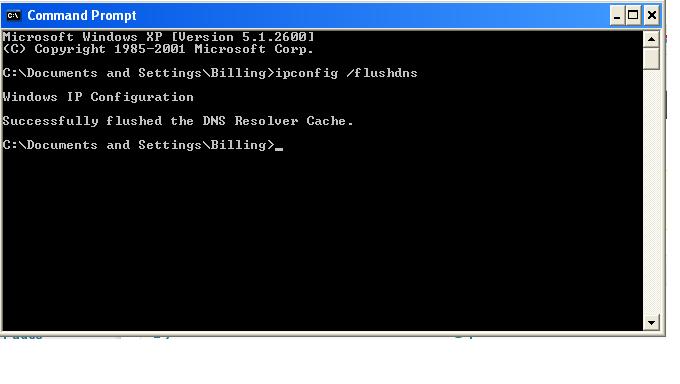
Buka cmd
ketik
ipconfig /flushdns
Jangan buka apa-apa tutup lagi DF / SD nya
New Terminal > /ip dns cache flush
Bikin script untuk flush dns di mikrotik
Via terminal :
/system script
add name=flush-dns policy=\
ftp,reboot,read,write,policy,test,winbox,password,sniff,sensitive,api \
source="/ip dns cache flush"
|

Bikin scheduler setiap 45 menit atau 30 menit untuk menjalankan script tersebut.
Via Terminal :
/system scheduler
add disabled=no interval=45m name=flush-dns on-event=flush-dns policy=\
    ftp,reboot,read,write,policy,test,winbox,password,sniff,sensitive,api \
    start-time=startup
|

Itulah yang sekarang saya terapkan , dan berhasil menyelesaikan masalah, tidak ada lagi user yang komplain karena tapilan yahoo mail nya error blank putih.
Saat domain dan hosting anda aktif, mungkin anda belum bisa membuka
domain melalui browser, bahkan jika anda melakukan ping menggunakan
command prompt, tidak akan mendapatkan repply atau mendapatkan pesan request could not find host.
Penyebabnya adalah propagasi DNS, dikarenakan setiap ISP memiliki
update berbeda untuk meresolve domain. Penjelasan tentang propagasi DNS
bisa di lihat di artikel Pengertian Propagasi DNS.
Waktu agar ISP bisa meresolve berbeda-beda, pada dasarnya sekitar 24 s/d 72 Jam, tergantung kecepatan update DNS ISP anda.
Jika anda enggan menunggu masa propagasi tersebut, silahkan gunakan trik berikut.
Untuk
pengguna Microsoft Windows bisa memodifikasi DNS di local komputer
sehingga langsung mengarah ke server saat memanggil domain caranya, edit
file di path C:\Windows\System32\drivers\etc\hosts dan edit seperti berikut;
Misalnya domain anda adalah domainsaya.com dan IP yang anda dapat adalah 10.10.10.10 silahkan tambahkan line berikut.
# Copyright (c) 1993-2009 Microsoft Corp.
#
# This is a sample HOSTS file used by Microsoft TCP/IP for Windows.
#
# This file contains the mappings of IP addresses to host names. Each
# entry should be kept on an individual line. The IP address should
# be placed in the first column followed by the corresponding host name.
# The IP address and the host name should be separated by at least one
# space.
#
# Additionally, comments (such as these) may be inserted on individual
# lines or following the machine name denoted by a '#' symbol.
#
# For example:
#
# 102.54.94.97 rhino.acme.com # source server
# 38.25.63.10 x.acme.com # x client host

# localhost name resolution is handled within DNS itself.
# 127.0.0.1 localhost
# ::1 localhost

10.10.10.10 domainsaya.com # Baris Yang Ditambahkan
10.10.10.10 www.domainsaya.com # Baris Yang Ditambahkan
Setelah selesai silahkan save file tersebut dan gunakan Flush DNS dengan cara;
ipconfig /flushdns Lalu coba lagi buka domain anda melalui browser. Jika belum bisa silahkan clear cache browser atau restart komputer anda.
Jika anda menggunakan router seperti mikrotik bisa menambahkan static IP address, ketikan text berikut di console mikrotik.
/ip dns static add address=10.10.10.10 name=domainsaya.com
/ip dns static add address=10.10.10.10 name=www.domainsaya.com
Lalu lakukan flush dns di mikrotik dengan cara;
/ip dns cache flush Lakukan juga flush DNS di komputer client anda.
Selamat Mencoba…
keunggulan dari dns unbound adalah simple dan bisa dituning lebih
tinggi. jadi belum dikasih squid saja udah cepet sekali koneknya heuheuhue.
OK kangsung saja ini panduannya yang benar wkwkwkkwkw di internet ga ada yang benar.
cari referensi sulit yaa langsung ke web alsina aja wess website unbound ambil dengan wget di putty
sebelumnya uninstall dulu bind9 dengan tasksel
# tasksel
hilangkan tanda bintang pada dns-server dengan tombol space
[ * ] Server DNS
jadi
[ ] Server DNS
install DNS UNBOUND
# apt-get install unbound
# cd /etc/unbound
# wget ftp://FTP.INTERNIC.NET/domain/named.cache
# unbound-control-setup
# chown unbound:root unbound_*
# chmod 440 unbound_*
saya menganjurkan backup unbound.conf dulu sebelum diobok-obok
# cp /etc/unbound/unbound.conf /etc/unbound/unbound.conf.asli
hapus semua isi tulisan file /etc/unbound/unbound.conf dan isikan ini
server:
verbosity: 1
statistics-interval: 0
extended-statistics: yes
statistics-cumulative: no
interface: 192.168.2.2 # saya revisi harus ada lan / eth1
interface: 127.0.0.1 # penggunaan cpu, nilai 1 = no threading, nilai 2 = go threading
num-threads: 2
# nilai 2 kali dari num-threads: 2
msg-cache-slabs: 4
rrset-cache-slabs: 4
infra-cache-slabs: 4
key-cache-slabs: 4
# gunakan 1/10 dari memory misal memory 512 mb
# msg-cache size = 512 / 10 = 51,2 ato 50 m
# untuk rrset-cache-size = msg-cache-size X 2
rrset-cache-size: 100m
msg-cache-size: 50m
# rumus untuk single core pentium 4 adalah memory : 2
# sedangkan untuk dual core dan lainya rumusnya 1024/cores - 50
outgoing-range: 256
# Larger socket buffer. OS may need config.
so-rcvbuf: 4m
num-queries-per-thread: 1024
cache-max-ttl: 86400
infra-host-ttl: 900
infra-lame-ttl: 900
infra-cache-numhosts: 10000
infra-cache-lame-size: 10k
key-cache-size: 4m
do-ip4: yes
do-ip6: no
do-udp: yes
do-tcp: yes
do-daemonize: yes
access-control: 0.0.0.0/0 refuse
access-control:192.168.2.0/24 allow # saya revisi juga harus ada lan / eth1
access-control: 127.0.0.0/8 allow
chroot: "/etc/unbound"
username: "unbound"
directory: "/etc/unbound"
#logfile: "/etc/unbound/unbound.log"
#use-syslog: yes
logfile: ""
use-syslog: no
#pidfile: "/etc/unbound/unbound.pid"
root-hints: "/etc/unbound/named.cache"
identity: "DNS"
version: "1.4"
hide-identity: yes
hide-version: yes
harden-glue: yes
do-not-query-address:192.168.2.0/24 # saya revisi harus ada lan / eth1
do-not-query-address: 127.0.0.1/8
do-not-query-localhost: yes
module-config: "iterator"
#zone localhost
local-zone: "localhost." static
local-data: "localhost. 10800 IN NS localhost."
local-data: "localhost. 10800 IN SOA localhost. nobody.invalid. 1 3600 1200 604800 10800"
local-data: "localhost. 10800 IN A 127.0.0.1"
local-zone: "127.in-addr.arpa." static
local-data: "127.in-addr.arpa. 10800 IN NS localhost."
local-data: "127.in-addr.arpa. 10800 IN SOA localhost. nobody.invalid. 2 3600 1200 604800 10800"
local-data: "1.0.0.127.in-addr.arpa. 10800 IN PTR localhost."
#zone cjmedia.net, samakan dengan dhcp
local-zone: "cjmedia.net." staticlocal-data: "cjmedia.net. 86400 IN NS ns1.cjmedia.net."
local-data: "cjmedia.net. 86400 IN SOA cjmedia.net. hostmaster.cjmedia.net. 3 3600 1200 604800 86400"
local-data: "cjmedia.net. 86400 IN A 192.168.2.2"
local-data: "www.cjmedia.net. 86400 IN A 192.168.2.2"
local-data: "ns1.cjmedia.net. 86400 IN A 192.168.2.2" # sama didhcp server
# layanan mail
local-data: "mail1.cjmedia.net. 86400 IN A 192.168.2.2"
local-data: "cjmedia.net. 86400 IN MX 10 mail1.cjmedia.net."
local-data: "cjmedia.net. 86400 IN TXT v=spf1 a mx ~all"
# dns bind hanya diremove systemnya bukan file nya dengan tasksel
local-zone: "168.192.in-addr.arpa." staticlocal-data: "168.192.in-addr.arpa. 10800 IN NS cjmedia.net."
local-data: "168.192.in-addr.arpa. 10800 IN SOA cjmedia.net. hostmaster.cjmedia.net. 4 3600 1200 604800 864000"
local-data: "2.2.168.192.in-addr.arpa. 10800 IN PTR cjmedia.net."
forward-zone:
name: "."
forward-addr:192.168.2.2 # ini saya revisi forward dns local harus ada
forward-addr: 180.131.144.144forward-addr: 180.131.145.145
# anda bisa menambah lebih banyak lagi dns spidol
remote-control:
control-enable: yes
control-interface:192.168.2.2 # saya revisi lan / eth1 harus ada
control-interface: 127.0.0.1
control-port: 953
server-key-file: "/etc/unbound/unbound_server.key"
server-cert-file: "/etc/unbound/unbound_server.pem"
control-key-file: "/etc/unbound/unbound_control.key"
control-cert-file: "/etc/unbound/unbound_control.pem"
save dan tutup kemudian check konfigurasi unbound diputty
# unbound-checkconf /etc/unbound/unbound.conf
jika komeng keluarnya gini
unbound-checkconf: no errors in /etc/unbound/unbound.conf
berarti konfigurasi sudah betul.
tambahkan dns option pada file /etc/network/interfaces agar modem bisa mengarah ke localhost 127.0.0.1
buka file /etc/network/interfaces. tambahakan baris berikut setelah gateway modem dan sebelum auto eth1
lihat tulisan merah
auto eth0
iface eth0 inet static
address 192.168.3.2
netmask 255.255.255.0
broadcast 192.168.3.255
gateway 192.168.3.1
# dns-* options are implemented by the resolvconf package, if installed
dns-nameservers 127.0.0.1
auto eth1
iface eth1 inet static
address 192.168.2.2
netmask 255.255.255.0
broadcast 192.168.2.255
save dan restart networking
# services networking restart
restart unbound
# /etc/init.d/unbound restart
kemudian check dns lookup dengan cara
# nslookup
> 192.168.2.2
> 127.0.0.1
> localhost
> cjmedia.net
> www.cjmedia.net
> mail1.cjmedia.net
> google.com
> yahoo.com
> gmail.com
> exit
jika tidak ada masalah maka sudah benar dan reboot kompie anda
# reboot
lihat prosesnya di kompi ubuntu server jika lihat prosesnya berarti sudah ok
recursive DNS server unbound [ OK ]